This series of posts will be all about yurt features that become apparent when a yurt is taken apart. There are of course many different ways of building yurts, even within the same region, but this particulare series of photos was taken by Steph Carlisle in Mongolia in 2006. You can find her at her
blog on blogspot where I found my way to these photos. The photos are hers, the comments are mind.
1.
 |
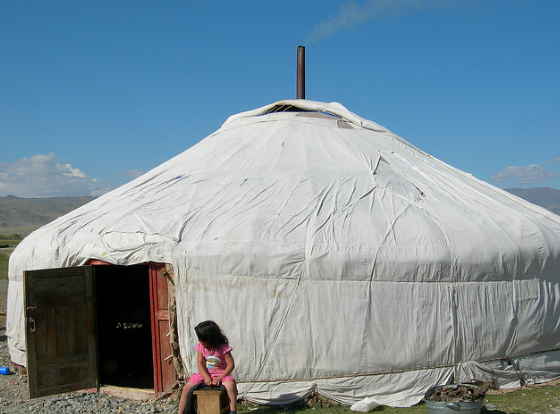
| This is a view of the yurt's exterior, The exterior cover, apparently a layer of white canvas is laid over the yurt, covering the felt underneath and extending over both the roof and the walls. The stove pipe is still in place and the smoke hole cover as well. Ropes holding the cover to the wall are also still in place. |
2.
 |
| This photo probably precedes the previous one in the deconstruction series. The person in the foreground is removing a layer of reed matting that protects the bottom perimeter of the yurt. Also note that there are a lot more ropes still holding the canvas cover in place. The stove on the inside of the yurt is apparently still chugging away. |
3.
 |
| Here we've pulled the outer cover off the yurt. The yurt in the background is still covered by the felt layer under which is another layer which we will see shortly. |
4.
 |
| Oh yeah, another out of sequence shot. Before you can take off the smoke hole cover, you have to pull the stove pipe off the stove. The stove pipe goes through the small hole in the cover. That small hole is rimmed with metal to keep the cover from charring. |
5.
 |
| Just for reference, here's the stove in the center of the yurt slightly off to one side of the the two poles that support the tono or center ring that all the rafters go into. The stove pipe rises vertically toward the smoke hole cover. In the old days before stoves, people used to build their fires in a hearth right in the center of the yurt. But that was a lot more smokey than making fire in a stove. |
6.
 |
| Once the top layer of canvas is removed, the layer of felt is exposed. Felt adds insulation but is not particularly strong like woven cloth, one of the reasons that there is a wooden structure supporting the canvas and the felt. The felt cannot just be stretched over a few poles like tent cloth. |
7.
 |
| This photo shows how layers of felt are kept in place. The edge of a piece of felt has a braided rope sewn to it so the tension of the ropes attaching the felt to the framework and other pieces of felt is carried by the ropes rather than the felt itself. |
8.
 |
| A piece of roofing felt is off the roof. The roof is conical and so the felts that cover the roof are sections of a full circle. The half circle in the center is where the felt buts up against the smoke hole. |
9.
 |
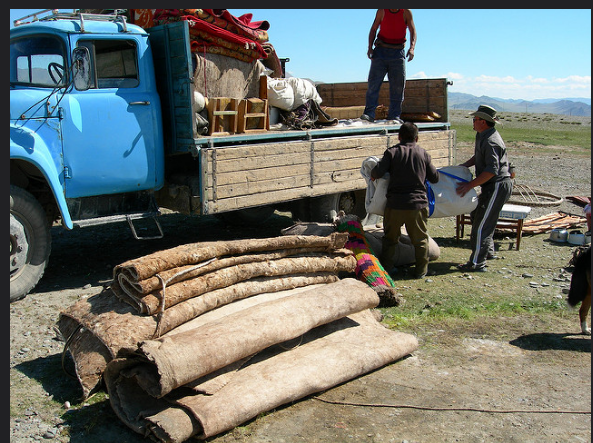
| Piles of felt from both the roof and the wall piled up next to the truck which will haul the yurt to its next destination. Note that this yurt is not a backpacking tent. |
10.
 |
| The outer canvas cover also gets folded up. |
11.
 |
| Under the wall felts is a layer of reed matting. The reed matting provides a smoother surface for the felt to lay against than the wall lattice would provide by itself. |
12.
 |
| While someone is rolling up the reed matting on the wall someone else is pulling the bottom layer of canvas off the roof. |
13.
 |
| A view of the reed matting adjacent to the door from the inside of the yurt. |
14.
 |
| Another inside view of the yurt while the reed wall and the canvas roof cover are still in place. Also note the band over the rafters. |
And that's it for today. All the outer coverings are off the yurt. Still left standing is the wooden structure of the yurt, walls, door and roof. The next segment will deal with their de-construction.


I have been visiting different online journals for Yurts. I have seen your blog as very helpful. Continue refreshing your blog with significant data. We’ve also a comprehensive range of Kids Yurt
ReplyDelete